*Video explanation at the end of the page
- On the Plugnote homepage, choose the form you would like to edit and click on the ellipses icon located in the column “Actions”, click on "Edit" and then "Edit Label"

- Search for the field "M01 - Sign" and give a label, for example, "Signature"

- By Clicking on the blue "Settings" icon you will see the field "Choose a PDF template or enter it manually (TPL23)". You can choose the template you prefer and click on "Save" - at the top of the page.

- PDF template options:
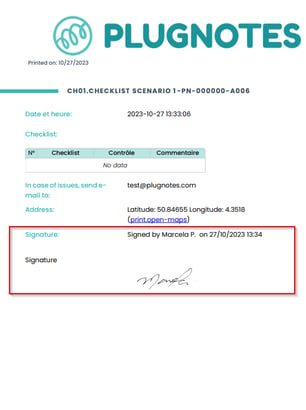
- Only Plugnote: Allows to check the signature, name, date, and time on the plugnote
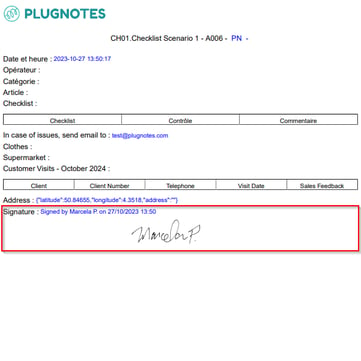
-Blank Layout: Signature only, no extra information
How to sign
- Open the plugform, search for the signature field, and press the blue "Pencil" icon
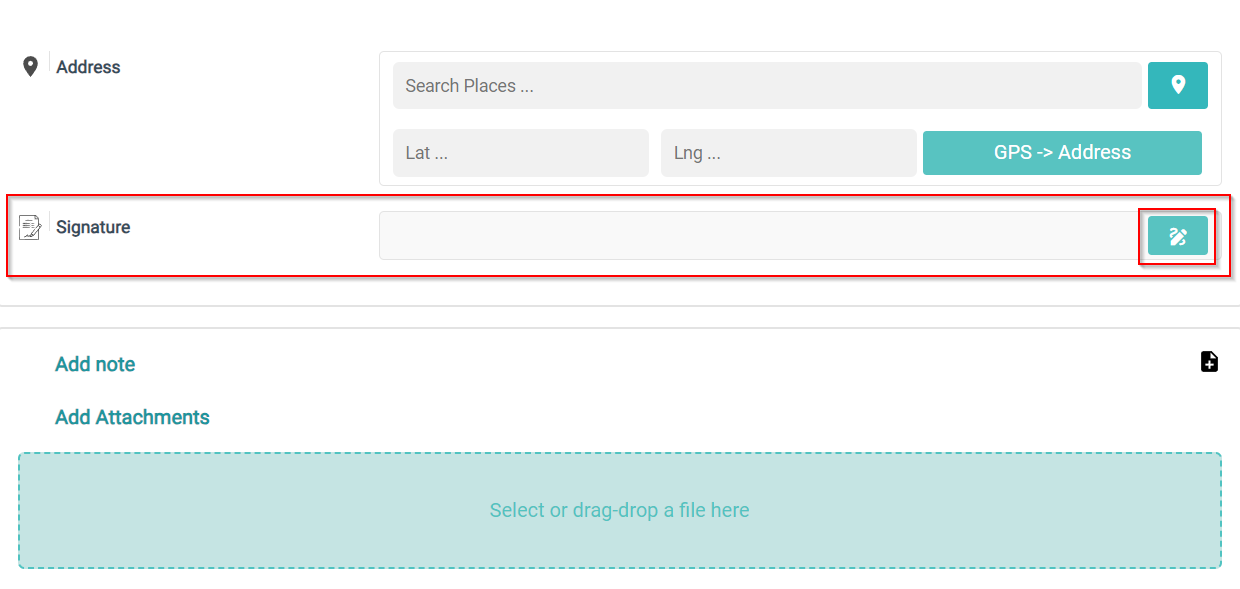
- A new tab will open and you can start to sign
- Type your name
- With the mouse, write your signature in the blank field
- Press the blue "Check" icon to confirm

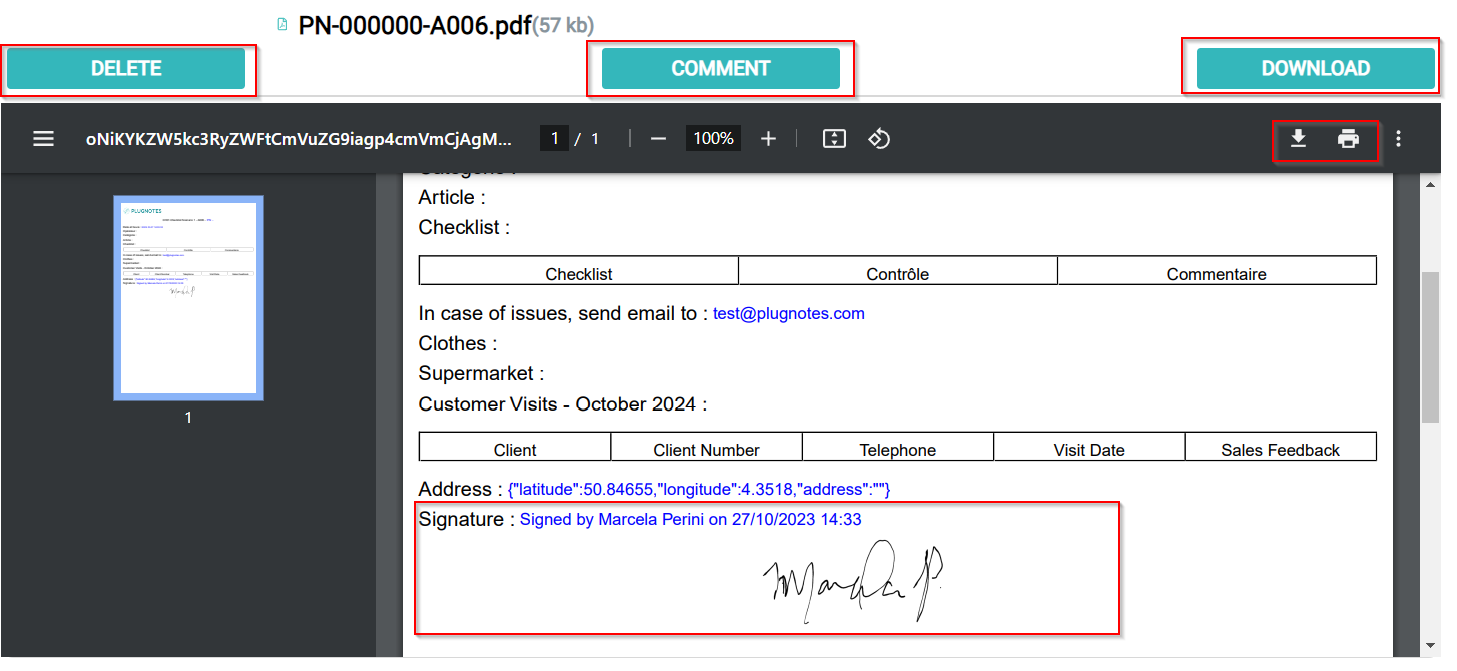
- As soon as you confirm, you will be able to check the signature on the file and also the "List of Attachments" below the page, which means your PDF is ready to be downloaded

- To preview the file on the field "List of Attachments", click on the name of the PDF file, and a new window will open. You can delete, comment, download, and print the file
--
Video Explanation
--
Customer Success
If you have any questions, please contact our Customer Success Team