Allows you to create a table with a different format per column (text, number, formula, num ref, etc...)
- Starting a Table F32
- Add a label with the subject
- Press in the "Settings" icon
- Go to the "Columns Field"
- Click on "Add a Column"

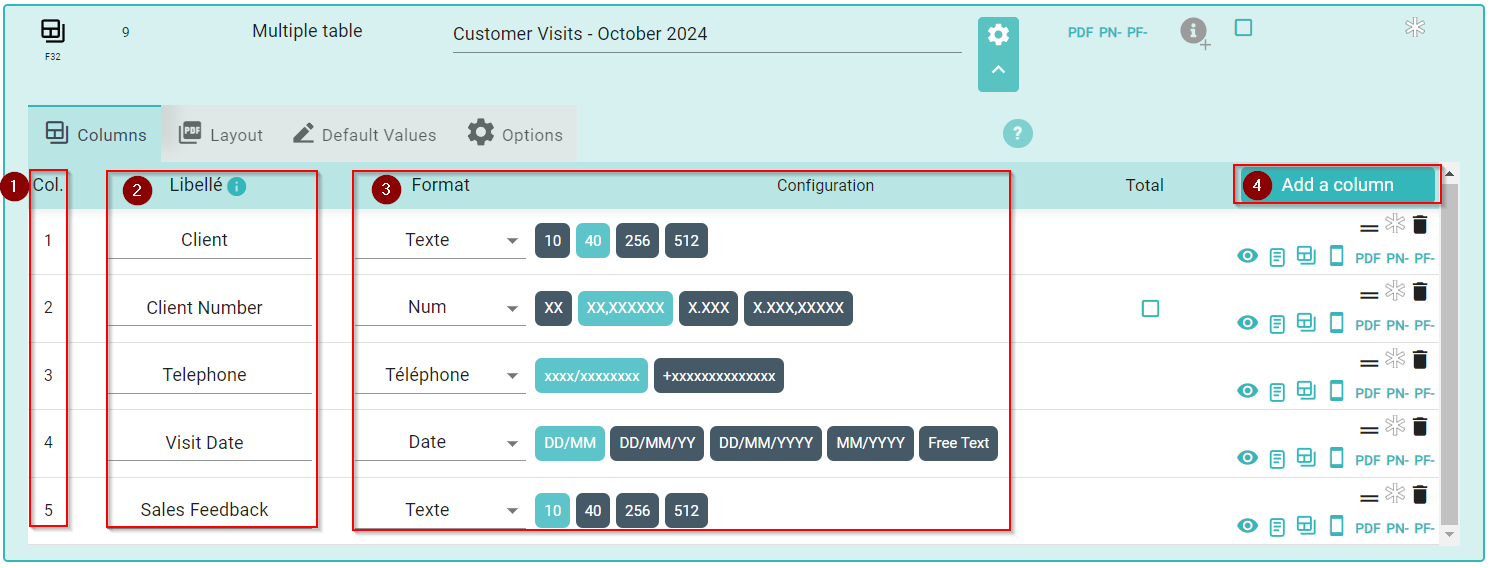
- Defining the base structure
- Columns: Shows how many columns your table has
- Libellé: Add the data you need to be in the form
- Format: Choose the most appropriate format of data. You can choose the maximum number of characters, telephone/date/time format, etc...
- Add a column: You can add columns by clicking on "Add a column"
- Filling the form
When the form is being filled out, people will be able to:
- View the requested date format on each item, for example: XX,XXXXXX
- Add more columns by clicking on the "+" icon at the top
- After filling in the necessary information, you must confirm that all information was filled in correctly by clicking on the "check" icon
- By clicking on the "ellipses" icon located at the end of each column, you can see the available editing options:
- Delete the row: You will delete the actual selected row
- Double-click to select several rows: This option allows you to delete several items simultaneously. A small "trash bin" icon will appear next to each column and you can select which ones you want to delete by clicking on it - the red color indicates that can be deleted. To delete the selected items, click on the big red "trash bin" icon at the top. To cancel the action, just click on the "X" icon
- Duplicate row: You will duplicate the actual row with the same information - Close the file

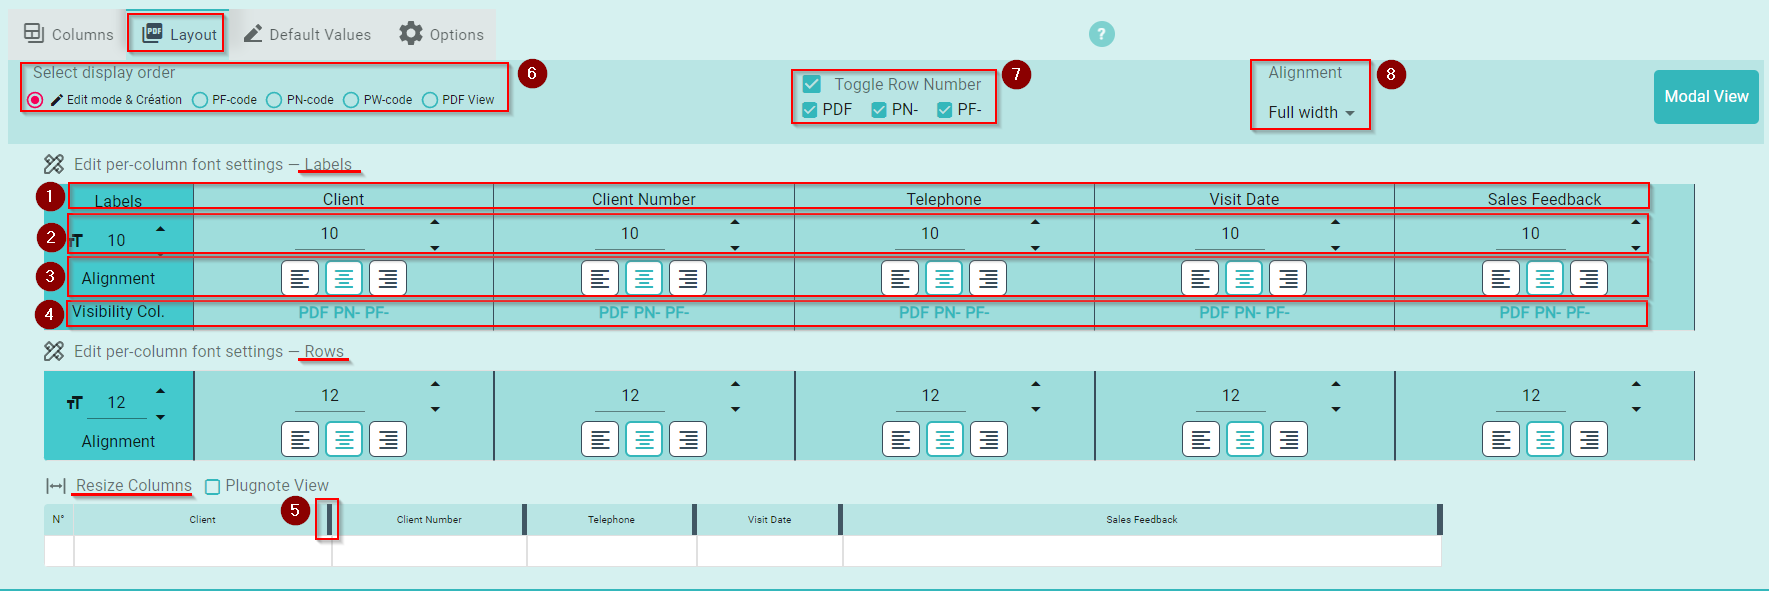
- Layout
The layout field will be separated into 3: Labels, Rows, and Resize Columns. Check below the instructions to change your layout:
- Labels: Use the titles to guide you through the editions
- Text Size: Allows you to choose the size of the text. Use the dropdown button to increase or decrease the size
- Alignment: Allows you to choose the text to be right-aligned, centered, or left-aligned
- Visibility Col.: PDF, PN, or PF
- Resize Columns: Pull the bar to the right or left side to increase or decrease the size of the columns
- Select display order
- Edit mode and Creation: To view the results based on the screen, choose what you wish to see: PF-Code, PN-Code, PW-Code, PDF View. - Toggle Row Number: Allows you to remove the toggle row number from PDF, PN (plugnotes), or PF (plugform).
- Alignment: Choose how your form will be aligned. In the dropdown button, you can choose between Full Width, right, centered, or left alignment.
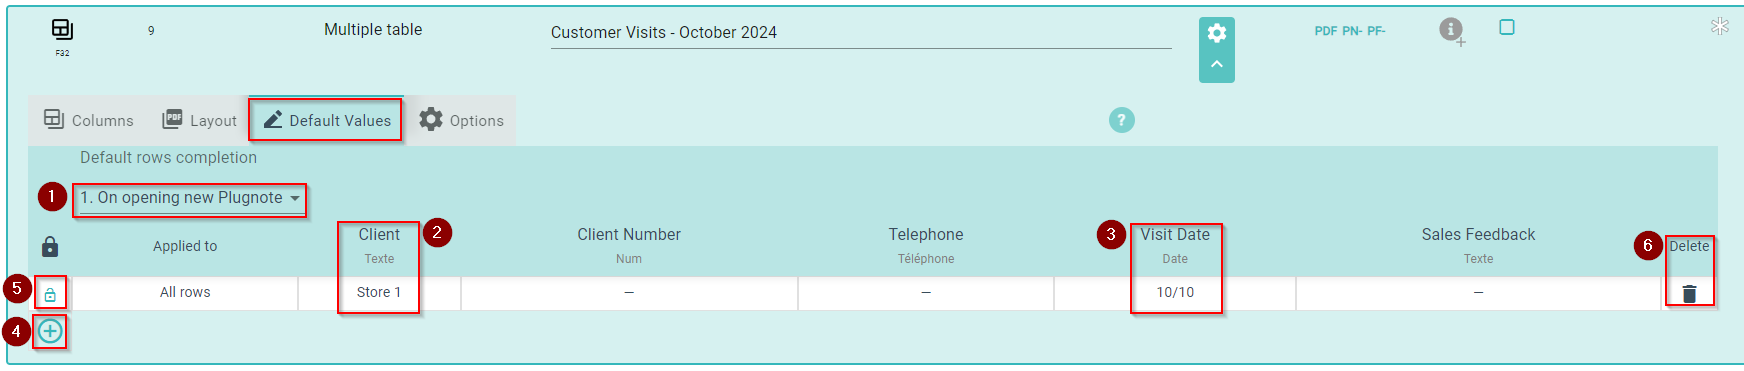
- Default Values
If the data in a specific column will always be the same one, you can automatize the process
- Click on the dropdown to check the options:
- On opening new Plugnote
- At once a new role
- Row by row - Default value: Ex: Client column
- Default value: Ex: Visit Date column
- Click on the "+" icon to add more columns
- If the "lock" icon is open it means the toggle could be deleted. To lock it is just to click on it
- Click on the trash icon to delete the column
The form will be like this: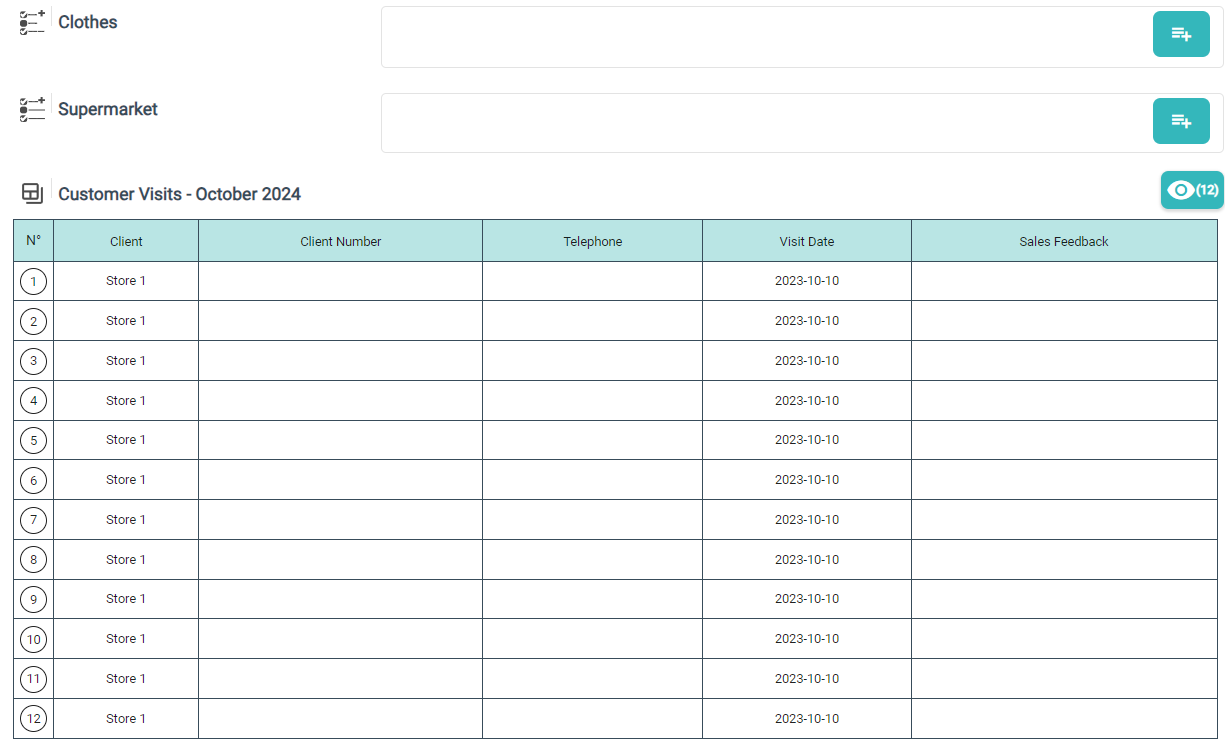
- Options
- You can choose to limit a maximum of rows by typing the desired number
- You can choose to change the form layout from vertical to horizontal mode by clicking on the icons

To Know
- The width of each column is linked to its format but also to the length of its label.
- It is possible to insert a total for the columns with a numerical format by checking in the setup the checkmark at the far right of the column line
Limitations
- It is not possible to copy a table to another control (F32 or S32)
- If you want to link a database to your table, more info via the S32 (Example: select multiple products in the Articles database)
--
Customer Success
If you have any questions, please contact our Customer Success Team