Send an email automatically to the recipient indicated in the settings. The subject, the sending address, and the content can be adapted according to the need
- Click on the "Settings" icon
- Click on "E-mail Template" to add and edit the content
- Check all the email options. Explanations of the features can be found below the image
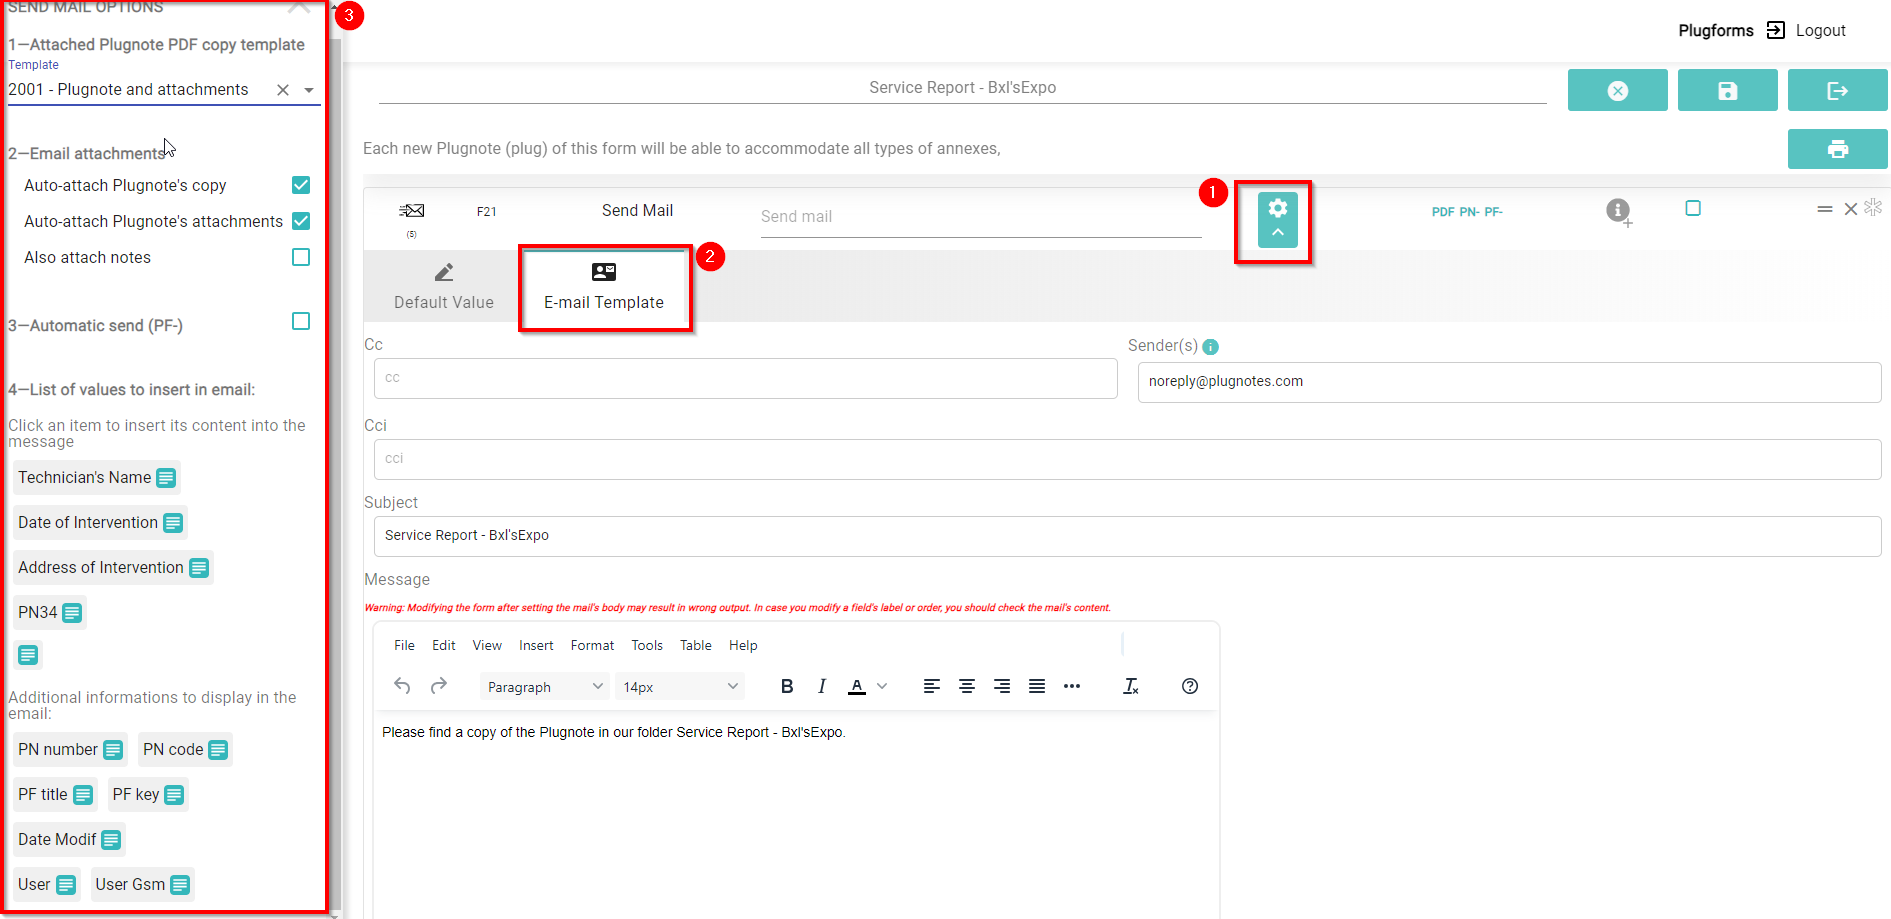
Explanations: "Send mail options" are divided into 4 segments:
- Attached Plugnote PDF copy template
By clicking on the arrow icon you will be able to choose between 3 models:
- Plugnote and Attachments: The plugnote will be attached and will see only the PF Code and responsible contact
- Only Plugnote: This way you will have a file with the complete information about your plugnote.
- Blank Layout: None attachment - Email Attachments
- Auto-attach Plugnote's copy
- Auto-attach Plugnote's attachments: Allows the form attachment to be sent along with the email
- Also attach notes - Automatic Send (PF): If the box is marked, every time you submit the form an automatic email will be sent to the person in charge after clicking "save".
If the box is not marked, you will need to send it manually by clicking on the icon "Sent email" (2)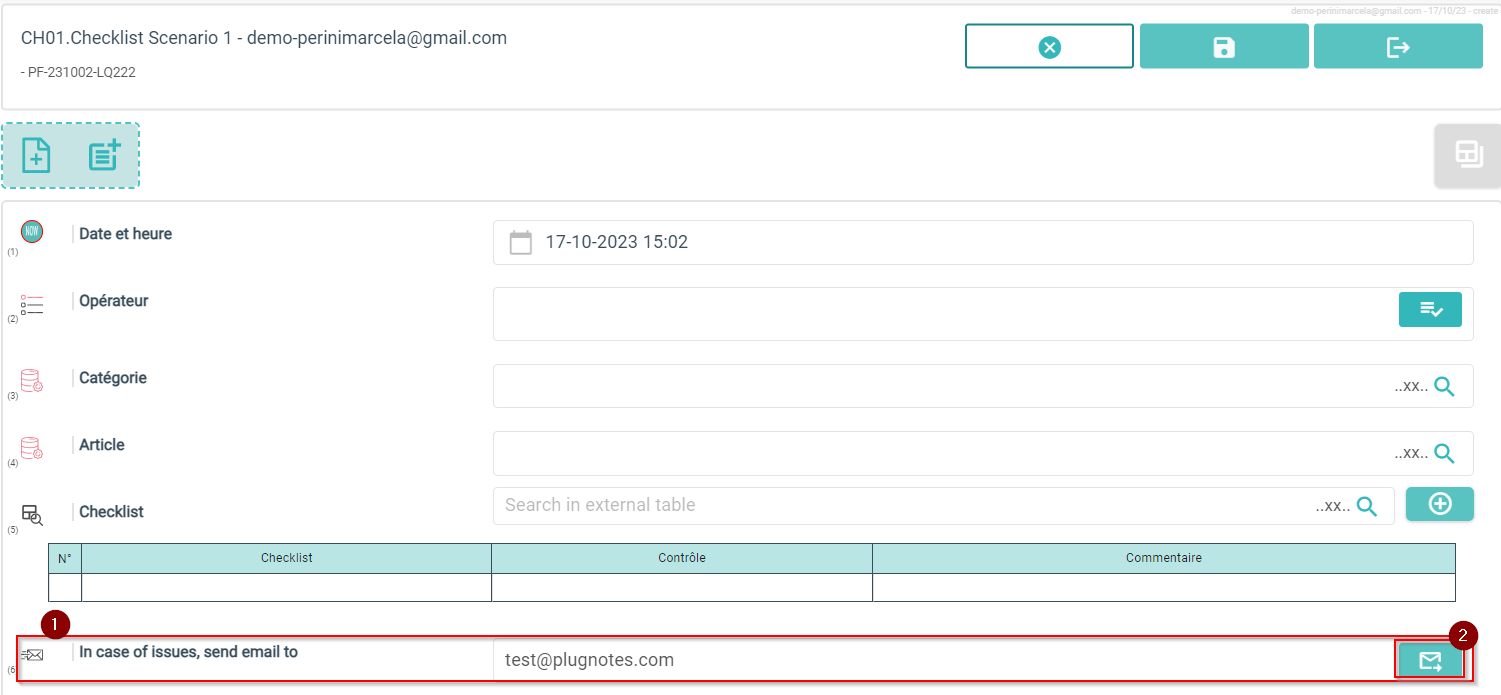
- List of values to insert in the email
- Click an item to insert its content into the message: You can choose between 15 extra items (depending on the fields you have on your form) to add to the email description
- Additional information to display in the email: You can choose extra items to display in the email description as the PN number, PN Code, PF title, etc.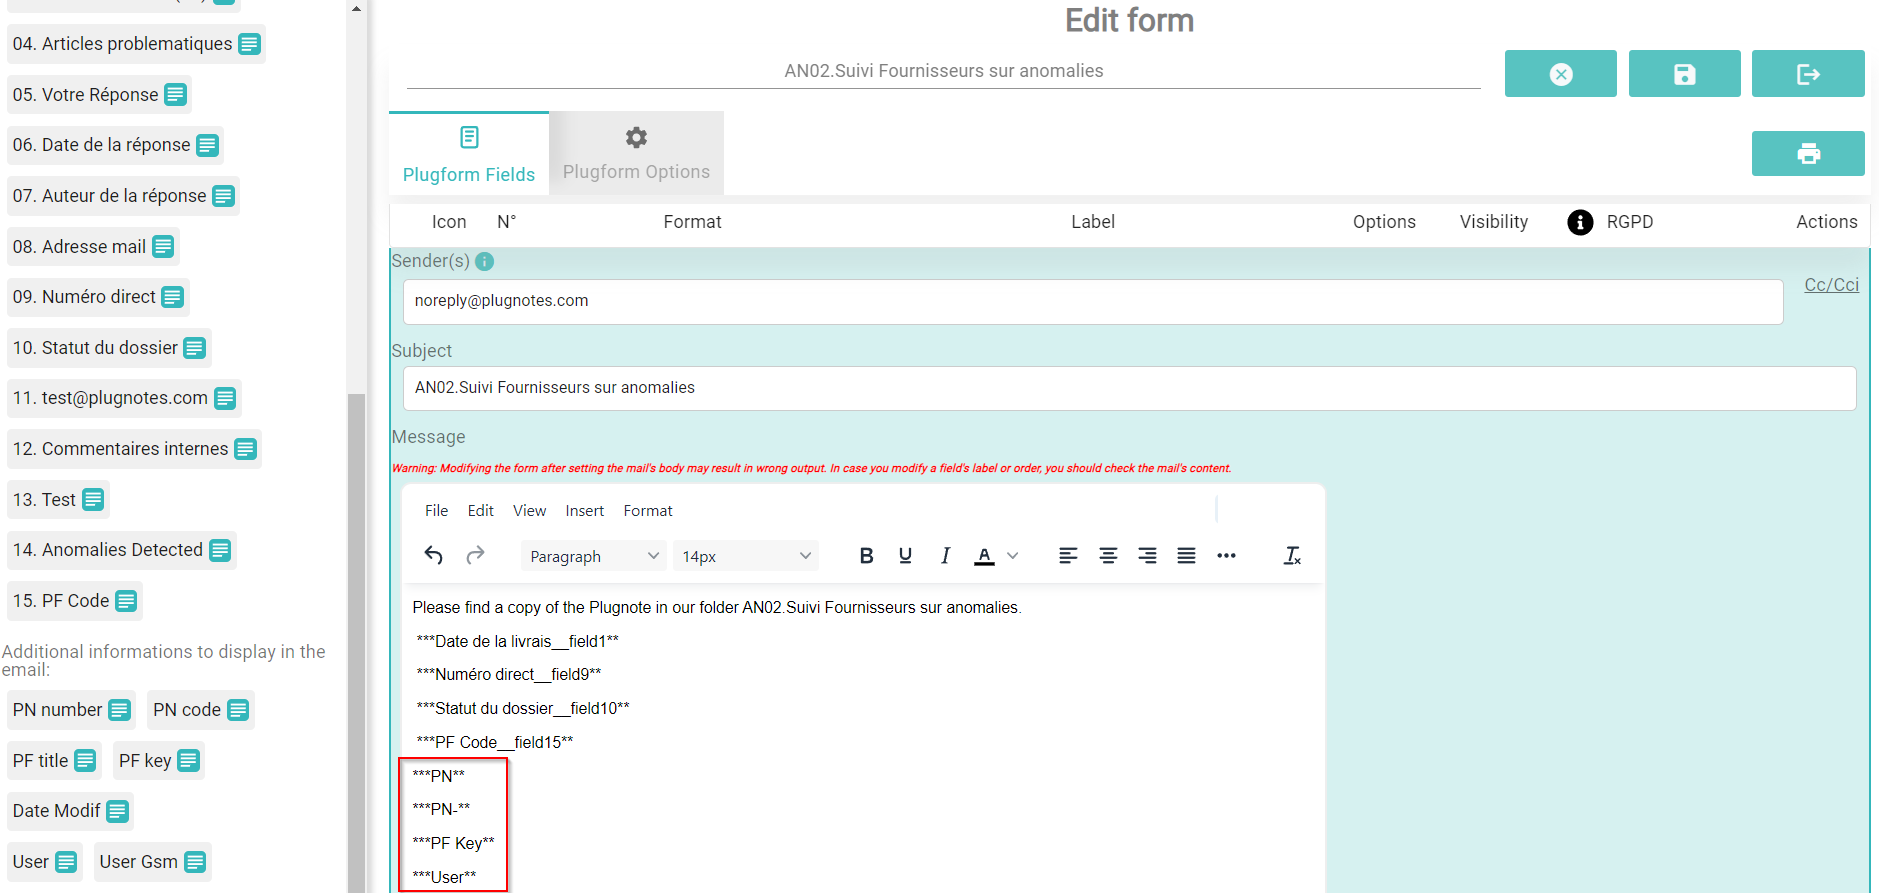
After saving your file, you can check all the information in the form and click on send. In the case of this example, the message should appear like this: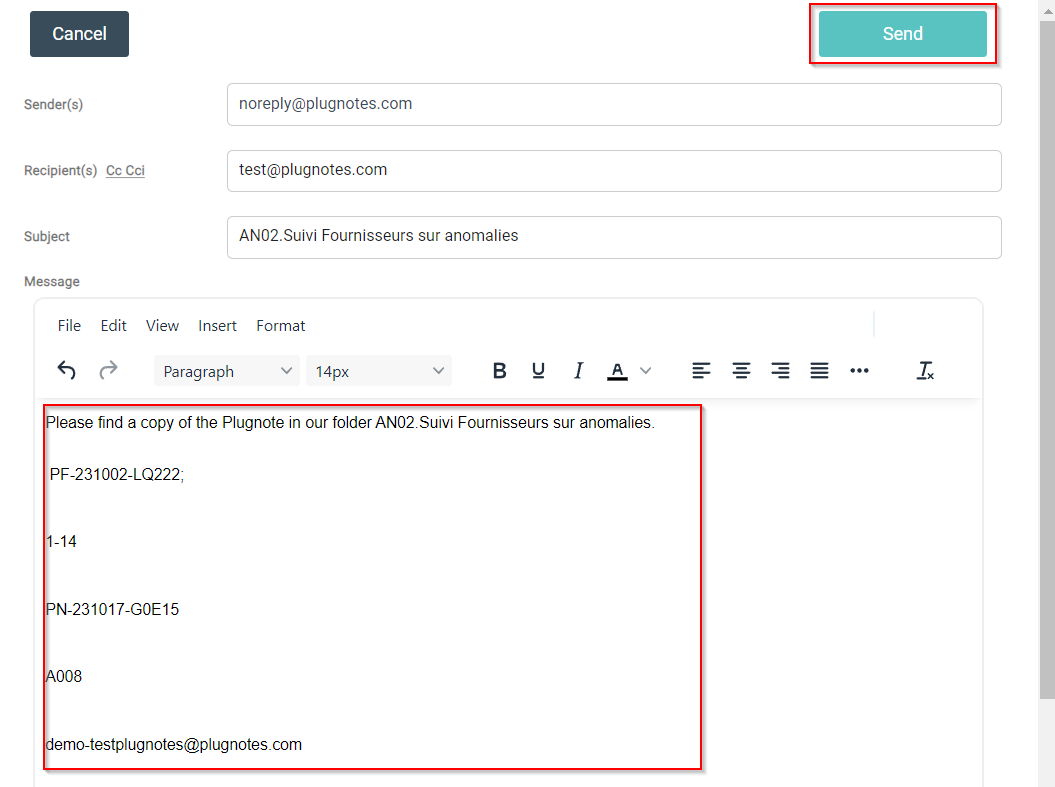
--
Email received example: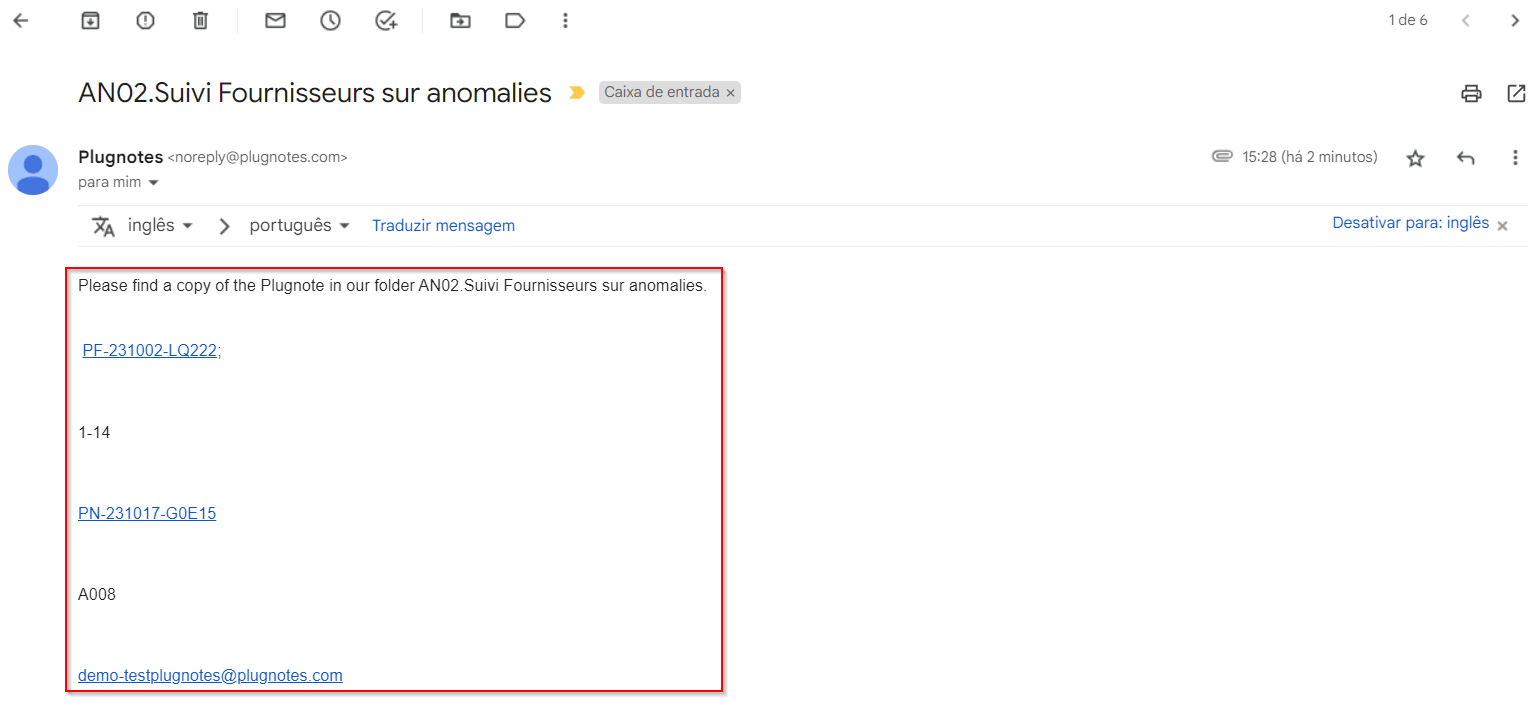
Note:
- By default, the email is sent from the Plugnotes server with a Noreply email address. If you want to send the emails from your own server, please contact the Customer success team.
--
Customer Success
If you have any questions, please contact our Customer Success Team
