Step 1: Obtain a security token
Open [Postman] (https://www.postman.com) and create a new request.
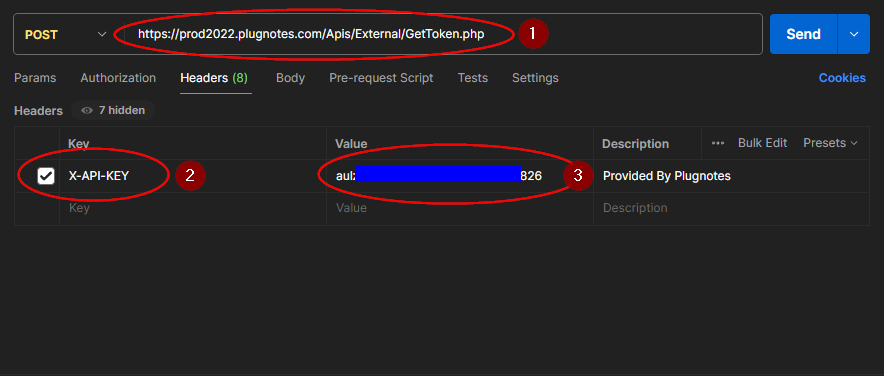
Set the request type to POST (in the drop-down menu to the left of the URL).
- Enter URL: https://prod2022.plugnotes.com/Apis/External/GetToken.php
- In the header section, add a key: X-API-KEY
- For the value, enter the unique key given by Plugnotes
Press “Send” to obtain:
-token
-uh
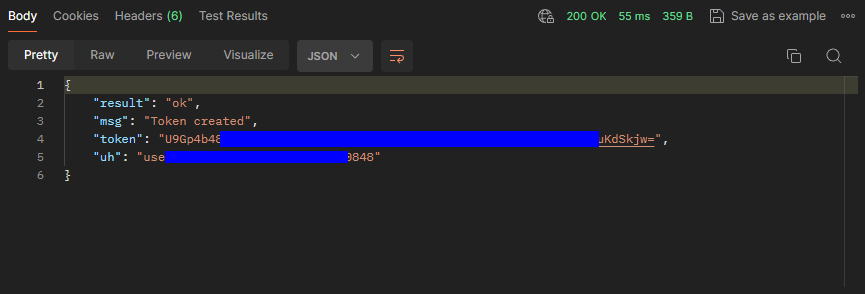
Result From Step 1:
Once the request has been sent, you should see this just below the parameters you filled in:
Step 2: Using the API
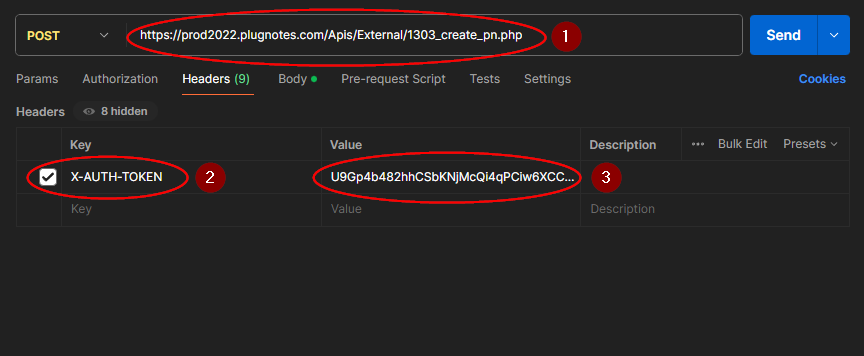
Using the security token, create a new POST request.
- Set the URL to: https://prod2022.plugnotes.com/Apis/External/1303_create_pn.php
- In the header section, add a key: X-AUTH-TOKEN
- For the value, it's the token from the previous request in “Result from Step 1”.
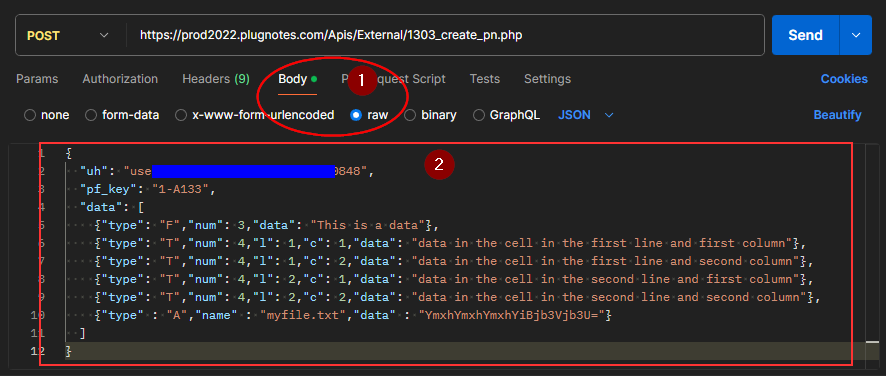
1. You then need to go to the Body section and select “raw”.
2. Once you have done that, you need to fill in the “uh”, “pf_key” and “data”:
“uh”: From the previous request.
“pf_key”: The key of the Plugform.
For “data” you’ll first need to understand how a Plugnote works:
Here is an example:
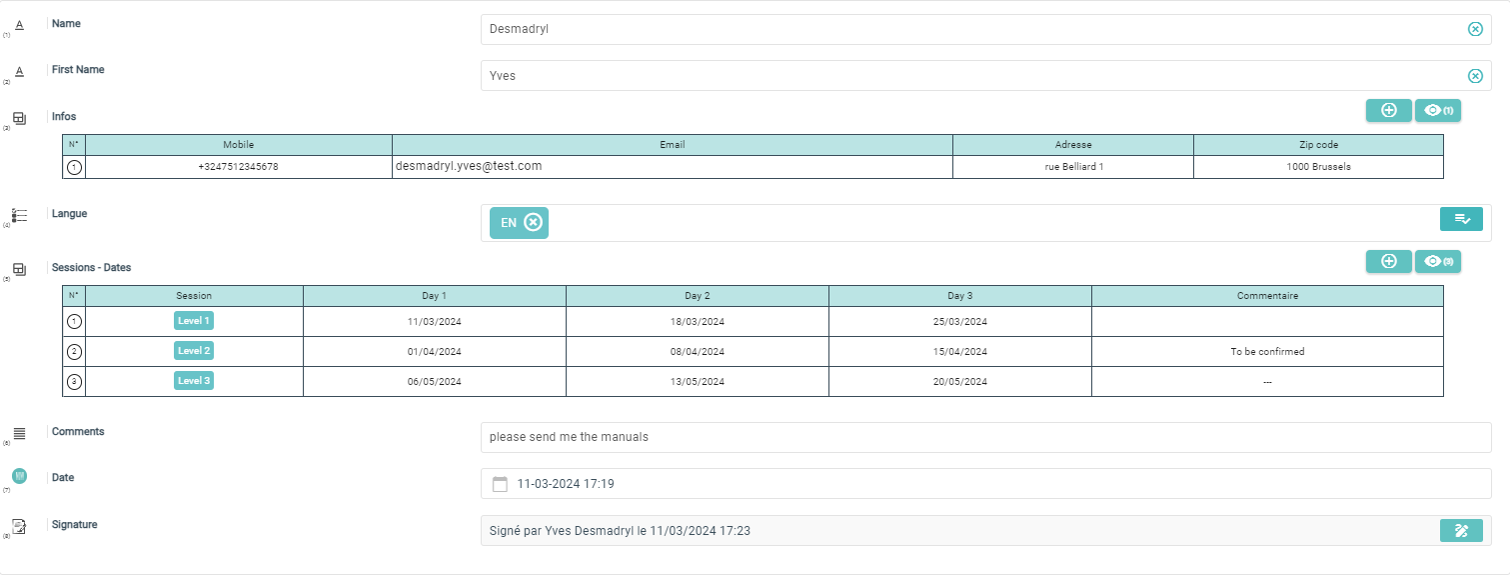
For example, if the first field is a string, the data line will look like this:
{"type": "F", "num": 1, "data": "This is a data"}.
Type "F" for strings, “num”: 1 for the field number, and data is the string to be inserted.
For a table, the type would be “T” but you’ll need to add a column and row number for each cell:
{"type": "T", "num": 3,"l": 1,"c": 1,"data": "data in the cell in the first line and first column"}
Type “T” for table, “num”: 3 for the field number, “l” (L) is for the row number, “c” is the column number and data are the string to be inserted in the cell.
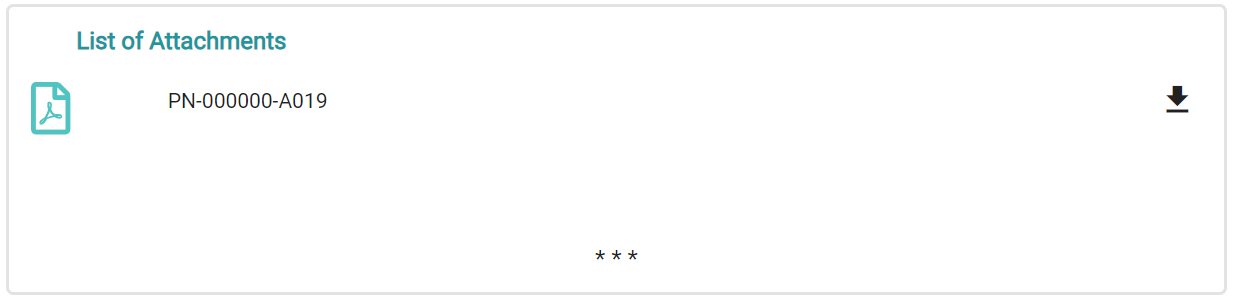
If you want to add and attachments, you’ll need to use:
{"type»: "A", "name": "myfile.txt", "data"»: "YmxhYmxhYmxhYiBjb3Vjb3U="}
Type "A" for files, "name" is the name of the file and "data" is the file in base 64.
Result From Step 2
Once you’ve completed the body of the request correctly, you can send it and you should receive something like this:

Result:
- If successful, you'll receive confirmation.
- In the event of a problem, an error message will be provided.
Note: Be sure to complete each step before proceeding to the next. In the event of a problem, consult the error message for assistance.
--
Customer Success
If you have any questions, please contact our Customer Success Team